Thursday, August 14, 2014

Altered Matchboxes, Graphic 45's Botanical Tea Paper Collection


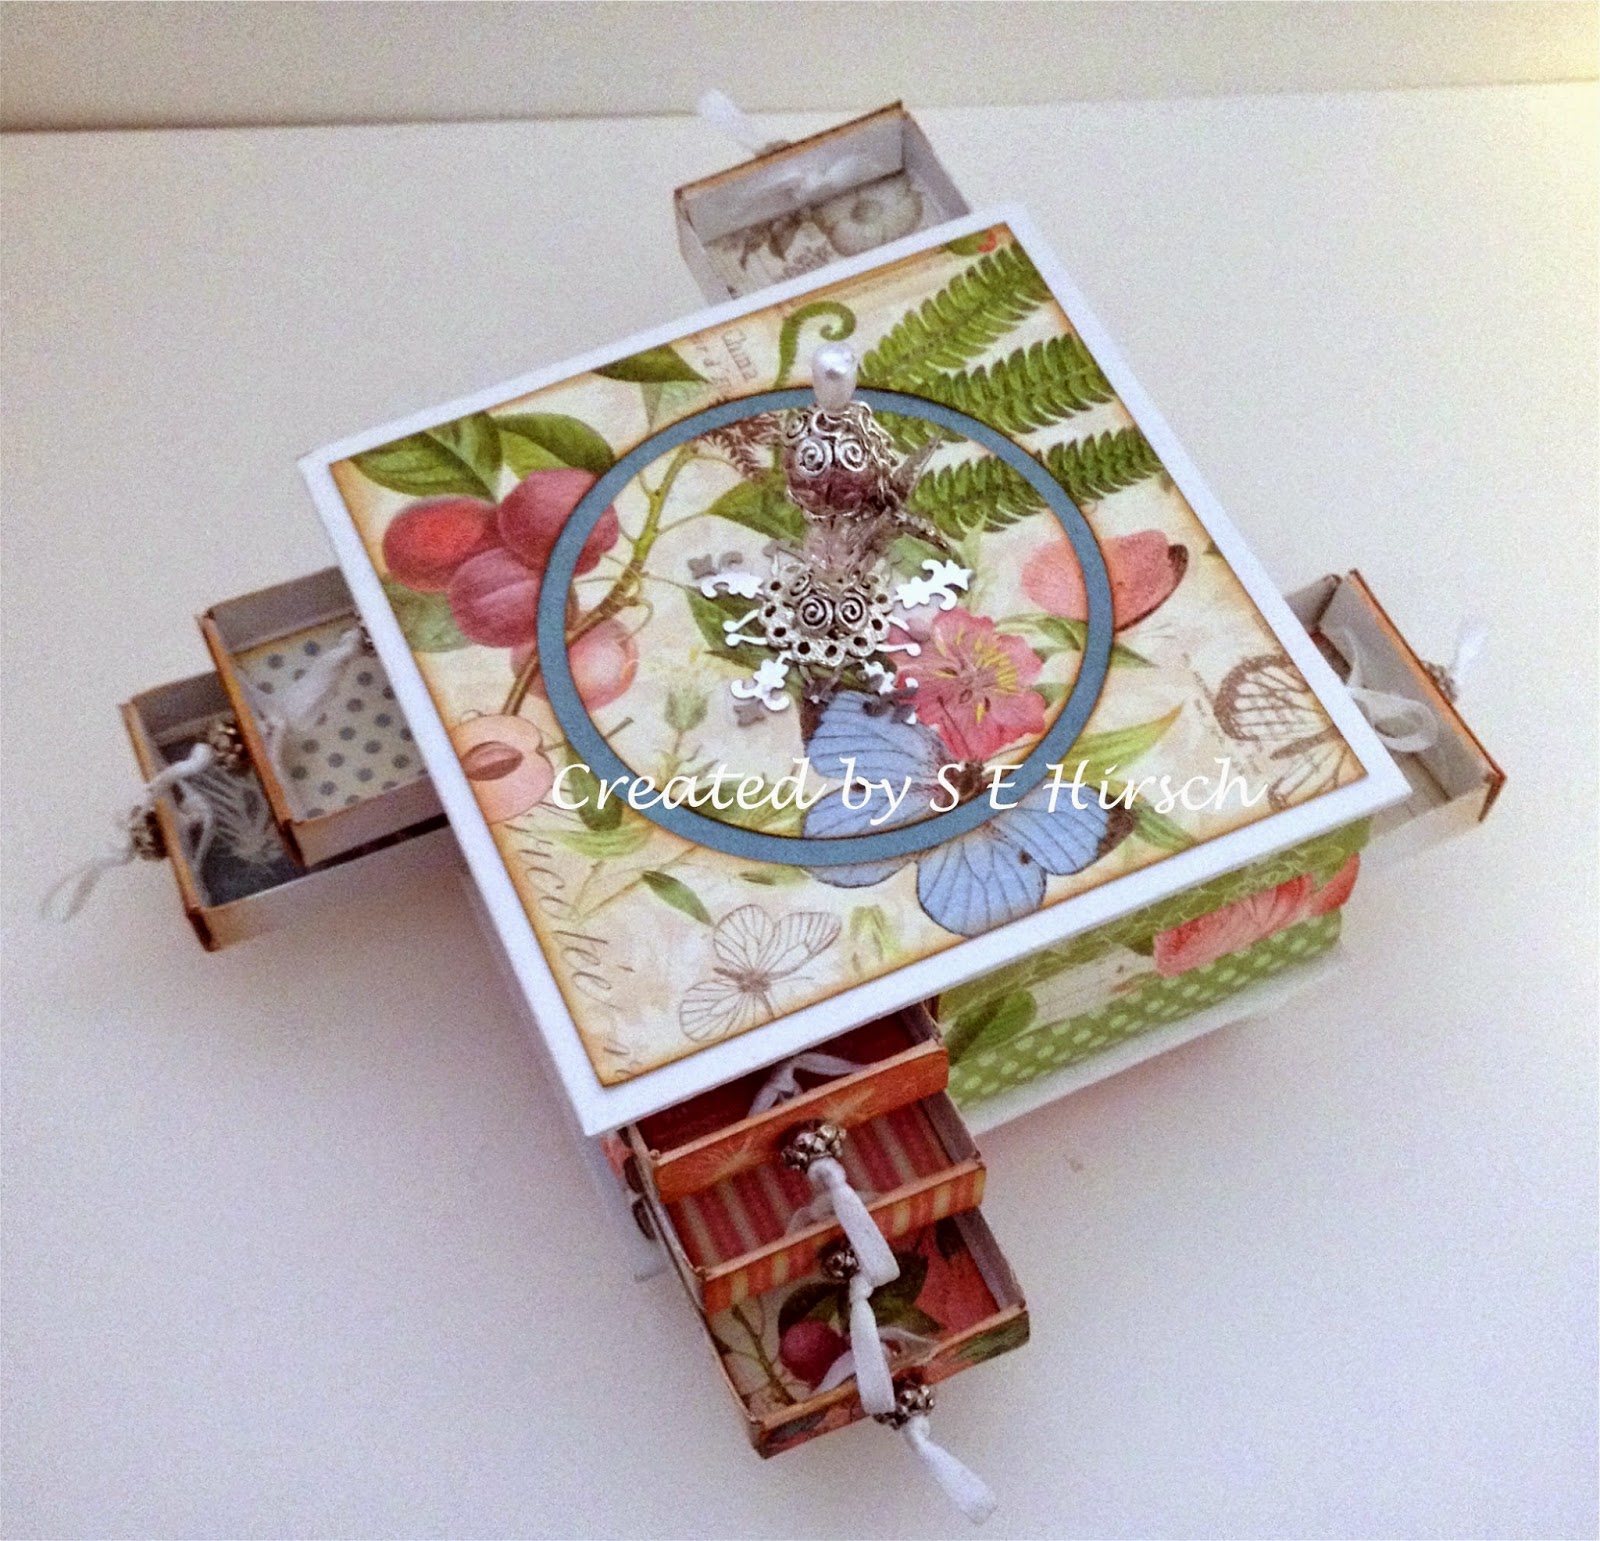
Awhile ago I participated in a challenge that required us to alter a matchbox (s). I decided to try altering the small size matchbox and combine several of them together. You can see the result of that challenge in my February 14, 2014 post. I have become addicted to altering matchboxes since that challenge! This is my latest matchbox creation which is similar to my first one. The first one is two matchboxes high and this one is three high. I made this one for a good friend of mine who loves the Graphic 45 Botanical Tea paper collection. So there was no question that I had to use that collection for this creation. She also loves hummingbirds. Hence the stick pin with hummingbird charm. Here are several views showing all the sides, top and inside the drawers.
Side view

All matchboxes are covered with Graphic 45's Botanical Tea  paper. Matchboxes are adhered to painted chipboard pieces that are also covered with the Botanical Tea paper.


Stick pin is handmade with a hummingbird charm attached.


Close up of stick pin and charm


  All drawers are painted on the inside and then lined with paper. Drawer pulls are made with ribbon.


Top view


 I hope I inspired you to try altering a matchbox or two! As always...thanks for stopping by and happy creating!


Friendship Card

A friend of mine sent me this image to color and turn into a card as a challenge. And a challenge it was as this is normally not my type of image. I kind of fussed and stewed and offered to make dinner if my friend would come and color the image for me. She informed me that I was perfectly able to color the image myself :)  I thought about bribing her next with an offer of cheesecake but instead I pulled out my color pencils and started coloring. I don't think it turned out too bad! Thanks for the image and the challenge Jenny!

Tuesday, August 12, 2014

Blocks Card


Something different today...a block card. A super easy card to make and folds up flat for mailing. Want to know how to make your own block card? Check out papercrafter45's video. Her videos / tutorials are awesome. Always easy to follow, fun , inspirational and sometimes with a bit of humor! She is one of my fav you tubers!

I would also like to share a link to my Pinterest board, "Block Cards", full of fun and inspiration of block cards that I have pinned.

Thanks for stopping by and checking out my block card!


Asian Inspired Mountain Scene Card


I made this card several months ago but never got around to posting it. Eeks! To create the card I stamped the mountains first. I then masked off the mountains and a portion of the top and bottom of the card so that I could ink in the sky. After I was finished with the sky, I removed all the masking and then stamped the dragonfly and Asian lettering. Lastly I embossed a straight line just below the mountain scene. A clean and simple look with no layers and didn't require extra postage for mailing!


Sunday, August 10, 2014

Happy Hopper Seed Shooter

How about a fun, smile maker card? The Happy Hopper Seed Shooter is just that. I remember as a kid, sitting on the back porch with my grandpa, eating watermelon and seeing how far we could spit our seeds. Fun days and fun memories! I colored the image with Prismacolor colored pencils. The Summer Fun sentiment is computer generated.

I hope you all have been having a fun summer making lots of happy memories.


For today's post I would like to share with you a card I made using inchies...7 inchies to be exact! I had so much fun making this card. I used watercolor paper with Ranger's Distress Ink to create the background. The inchies were made using the same background technique and then stamping my image of the dragonfly before cutting into 1" squares. I used a bit of Stickles added to the wings to add just a bit of sparkle to my card. Clicking on the photo will allow you to view a larger version of the photo.

Thanks for stopping by and taking the time to view my card.
Happy creating!

Friday, August 8, 2014

Vase Card Series


Wow! It has been a long time since I have posted last. I think it is time to do some catching up. Let me start with my vase card series, all using the same flower stamp and  die, and the emboss resist technique. The first one pictured above is actually the second one I made in this series. The flowers are stamped on a manila file folder with Versamark clear ink and then heat embossed with clear embossing powder. Two different colors of Ranger's Distress inks were then used to create the emboss resist technique. The two different designer papers used are from Graphic 45's Couture collection. Awwww Graphic 45...love their paper collections!

Below is pictured the first vase card in my series. You might remember it as it was featured in a past post of mine. I call it my "Seventies meets Japan" vase card.

Once again the emboss resist technique was used, again stamped on a manila file folder but only one Ranger Distress Ink was used this time. No designer paper was used, only solid color cardstock by Bazzill and an embossing folder to create the textured background.

The third card in my vase card series brings in some brighter color using two different colors of ink and designer paper also from the Graphic 45 Couture collection.

The fourth design in the series is in the works and will be posted later once completed.

I hope you enjoyed my vase cards. Thanks for stopping by and happy creating!