Showing posts with label tags. Show all posts

Monday, April 15, 2013

Coin Envelope Mini Tag Book / Accordion Tag Book

Three posts in one day! I know! That is a lot for me. I wanted to post one more style of a tag book / mini album that uses coin envelopes to create an accordion style. The tutorial is by Christina Betts. You can find part one HERE and part two HERE. I made my own coin envelopes and if you would like to know how I made mine...check out my earlier post HERE. I used Lumiere Paints in copper to paint my edges of the chipboard and then distressed the edges with walnut and black soot Distress ink by Ranger. I used Kraft cardstock to make my coin envelopes and the designer paper is by 7 Gypsies. I have not completed my tags yet but I will be sharing those at a later date when I do. This is really a super easy and fun project. I hope you will check out the tutorial!

An inside view:


In case you missed my earlier post...here is a couple of views of this tag book and the vertical toilet paper roll tag album that I posted earlier.

 Thanks for stopping by!

Sunday, April 14, 2013

Vertical Toilet Paper Tag Mini Album

 I love to make tags and what could be better than a collection of tags in a cute tag album! This is a vertical toilet paper roll tag album that uses an incredibly easy hinge system and toilet paper rolls.  I used a medium weight chipboard, designer papers by K&Company and a handmade flower from a swap I was in. I have cut my tags  from chipboard and both sides have designer paper on them but I still have some more to do to the tags and will have to share those at a later date. I think I may be doing some more embellishing as well to the inside of the album. Meanwhile, you should check out Ginger's (mysisterscrapper) awesome tutorial on how to make the vertical toilet paper roll album. You can find the tutorial HERE for part one and HERE for part two. Her tutorials are well done and so easy to follow. She does some amazing work and creates some beautiful mini albums. I hope you check out her tutorial.
Here is an inside view of the album:


Thanks for stopping by!


Tuesday, January 29, 2013

Clean and Simple Vintage Tag

Hello crafty friends! It has been one crazy Winter here in the Chicago area. Incredibly warm and no snow worth talking about. We are breaking all kinds of records this Winter. Other parts of the country are not so lucky. I hope wherever you are that you are staying warm and having some crafty time.

I made this tag for a challenge on ScrapZee.com. The challenge was to make something that uses a handmade flower. I made my flower from a paper bag and then spritzed it with walnut stain ink. I chose to make a tag to put it on. This is what I call..."my clean and simple approach to vintage"!

Thanks for stopping by and happy crafting!

Wednesday, December 19, 2012

A Peaceful Christmas / Christmas Card and Tags

 As promised earlier, I am back with another Christmas card. I made 4 different designs this year and this was my favorite of the four. The sky is made with blending 4 inks from the Tim Holtz Distress Ink collection. I used Tumbled Glass, Weathered Wood, Chipped Sapphire and Black Soot. The village and star are  dies from Memory Box. Very clean and simple but I thought elegant looking...most certainly my favorite this year.

And what does the perfect gift need? A pretty tag of course! Below is a tag that I made using the embossed resist technique and the same village die from Memory box that I used on the above card.
 For a fun tag I used a cuttlebug embossing folder, Sizzix alphabet die and a Santa hat rubber stamp to create the tag below.


Wishing you all a very Merry Christmas. May it be safe, joyful and spent with family and friends.

Sunday, September 23, 2012

A Chest of Drawers Tag

Just a quick post to share a tag with all of you that I recently made for a swap I hosted on the Card Swaps forum of the CardMaker site. Using a tag die by Sizzix, I cut three layers... two from Kraft cardstock and one from a kleenex box. I sandwiched the kleenex box piece between the two Kraft cardstock pieces. Using a label die from Spellbinders I cut the bottom piece out to form the legs of the dresser. All pieces were inked on the edges using  Tim Holtz's walnut distress ink by Ranger. Strung some pearls on thread to make the necklace and added a bit of lace trim for the bottom drawer. It was a lot of fun to make!

Thanks for stopping by and Happy Autumn to all my crafty friends!

Saturday, August 25, 2012

Asian Inspired Tag and a Cute Little Purse


If you didn't get to join in on the Treat Yourself Crop week before last at Card Swaps...then you missed out on a lot of fun challenges! I still have a lot of things going on in my life right now so I was only able to do two of the challenges. Meredith asked us to make a tag using a specific technique of coloring and embossing. The idea is to ink your background and then stamp it in another color. You then stamp your main image with versamark ink and then clear emboss. Then you apply a darker ink all over your tag. The embossed area will reject the darker ink causing the lighter ink and stamping to show through. For Meredith's full tutorial click HERE.

I was inspired by the Japanese Shinto wood charms for my tag. I used 3 different colors of distress ink, a Japanese script rubber stamp, a Japanese crane rubber stamp and a Japanese symbol rubber stamp. For my tag base I used a kleenex box that I cut the tag shape out of to give some stability as if it were wood. I then cut two more tag shapes out of a manilla folder. After inking both pieces I then placed one on each side of the tag cut out of the kleenex box. The back of the tag is inked with black walnut distress ink to help make the tag look like wood. I then chose to top off my tag with a Japanese Omamori Tassel knot. For a tutorial on how to make one, click HERE.

The second challenge I did was hosted by Margaret. She had us make these adorable little purses.

I kept mine super simple but you can embellish them as much or as little as you want. They are super simple to make. They would be absolutely adorable for a bridal shower or to house a small gift of jewelry or something for someone. You can find the tutorial on how to make these adorable purses HERE.

If you missed the crop this time....don't fret! The next one is coming up in November.  There will be lots of challenges, games, a blog hop, prizes, not to mention all the fun and inspiration!

Thanks for stopping by!

Tuesday, June 12, 2012

Red, White and Blue Tag / Memory Box dies

Have you discovered Memory Box dies yet? I LOVE, LOVE, LOVE them! They are my latest craze and I can't seem to get enough of them. They carry such a fun and unique line of dies that cut very nicely and are fun to work with.

I made this tag for a challenge that I hosted over at Card Swaps on the CardMakers site week before last. The challenge was to make a card or a tag using any shades of red, white and blue. There was a twist though....you could not make a USA patriotic card. The carousel birdcage, perched bird, woodland branch and flowers are all dies from Memory Box. The pine branch is a Martha Stewart punch.

Have a great week!

Wednesday, May 23, 2012

Rainbow Card & Tag

Whew, the Time To Shine Crop has finally ended over on the Card Swaps forum. It was loads of fun with challenges, games and a blog hop but also very hectic trying to do everything. I'm in the progress of getting my craft room back in shape as it always looks like a hurricane hit after a crop week. Thought I would take a quick break though and post some of the challenges I completed.
The card below was for prairiewildflower / Judy's challenge that she hosted titled "Bling Me Up Scotty". We were to create a card using an image of something that we see in the sky. It could be a stamped image or printed paper etc that featured something we see in the sky. I had a fairly new die that I was anxious to use of a rainbow. So this was the perfect opportunity for me to use it. We also had to add some "glitz" of some sort and somehow to our card. I glittered my rainbow making it very sparkly.

The rainbow die is by My Favorite Things and the clouds are a die by Memory Box. Cardstock is by Bazzill.

Another challenge hosted by Marlene was to make a card or any other paper project of your choice using either Glossy Accents or glossy embossing powder to gloss something on your creation. I was excited to see this challenge because it not only gave me the opportunity to use my rainbow die again but also gave me the opportunity to make a tag to go along with my card. I plan on giving the card to someone who graduated from college this year and the tag will be attached to a present.
So for my tag I used the same dies and same cardstock as the card . I added some baker's twine from Doodlebug and a picket fence from a Martha Stewart border punch. The rainbow looks dark in the picture but in real life it is not that dark and is very glossy. Not sure if I like the rainbow better glittery or glossy. What do you think?

Well this is two of the challenges I completed for the crop. There were 12 in all and I only managed to complete 6 of them. I will post the other 4 in the next day or two.  Every crop I make it my goal to complete all 12 but haven't managed to do that yet. Maybe the next crop that is coming up in August...

Thanks for stopping by!

Thursday, March 3, 2011

Tag Your It and a Favorite Thing


Over at Inspire Swap Chat there is a game going on called Tag Your It. Someone posts a tag they have made and the first person to post after them will receive the tag as well as they now offer a tag to the next person that posts. I have jumped in 4 times to play. Here are three of the tags I have made. The first is a Happy Hopper girly tag. The tag below was made using the ornament punch from SU. Cutting off the tip makes it look like a vase!

This last tag was made using a brass stencil from Dreamweavers and then embossed with copper embossing paste.

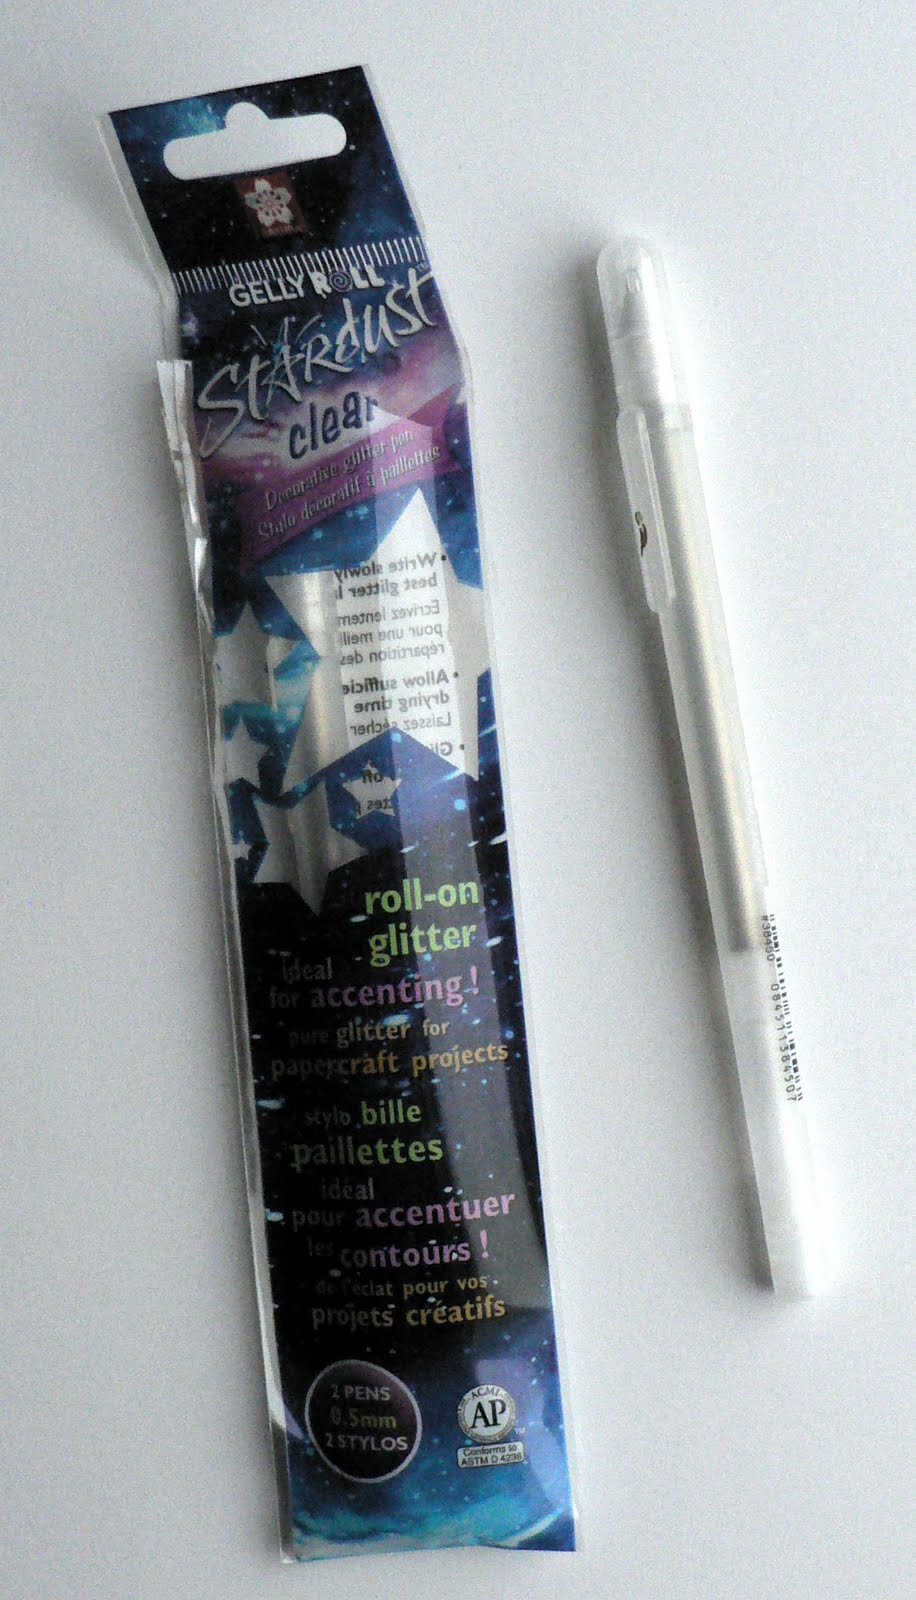
Then as promised I am posting a picture of another one of my favorite things. It's the clear Stardust Gel Pen. I LOVE this pen for when I like to add a bit of sparkle or glitter. I used it on the bubbles of the first tag. I also used it on the balloons of the Happy Hopper birthday card I made 2 or 3 posts ago. I keep this pen close by as I often use it to add just that bit of sparkle. It also comes in many colors but I like the clear one as I usually use it over colors on images that I have colored. If you haven't tried one of these pens...you should! I promise you will love it!

Thanks for stopping by!

Sunday, November 14, 2010

Challenges from the Sugar Crash Online Crop


A week ago was the Sugar Crash online crop over in the CardSwaps forum of CardMakers. You might have read one of my earlier posts as well as participated in the blog hop that was also part of the crop. 10 different challenges were posted for the online crop for everyone to try. I would have loved to have tried them all but only had time to do four of the challenges. The theme for the crop was lots of holiday glitter, bling and glam. It sure was hard trying to get good pictures to show all the bling! The picture above was for a challenge where we were to make two or more gift tags. I used my cute House Mouse stamp and glittered up the ornament as well as I used metallic cardstock for the border.

For the picture below the challenge was to make a suspension card. I used my scraps left over from my project for the blog hop to make my card suspending a snowflake. This is the first time I have tried making a suspension card and I really enjoyed it. I will be trying this technique again.

The next two pictures were for the challenge that required us to make a gift card holder. I used Dawn Griffith's tutorial to make this which you can find HERE.


This last picture is for the challenge that required us to use silver plus one other color. I chose to use white as my other color. This was the hardest picture to take. I used a really shiny metallic silver cardstock and no matter what I did....or what angle I used....I could not get a good picture.

I really enjoyed the online crop and I am looking forward to the next one!