Saturday, October 26, 2013

Graphic 45 Steampunk Debutante Mini Album


I have been hoarding this paper for way too long. Finally decided to put it to good use to make this 4" x 4" mini album. The front cover, the back cover and the spine were made using chipboard that I covered from the paper collection. I added some metal gears and key for embellishments. The woman with wings on the front cover was "fussy" cut from the paper, mod podged on lightweight chipboard and cut again. Then pop dotted onto the cover. The back cover I kept simple and free of embellishments. The copper strip of paper on the front and back covers are from a piece of hand made paper that my son picked up for me on his last vacation trip. Other than the copper paper, all other paper used is from Graphic 45's Steampunk Debutante paper collection.

The pages of the inside of the book are made using envelopes that I purchased from Hobby Lobby. Each page is also a pocket that holds a photo mat for photos. There are also journaling tags featured throughout the album. I kept the embellishments down to a minimum as I like the photos to be the main focus of the album. Also...how could you cover up this beautiful paper with a lot of embellishments. I LOVE the paper from this collection.

I also included a waterfall feature for photos and journaling on the inside front and back covers. The above pictures show one of the pages inside and the front cover waterfall feature. To finish off the little album I used a black braided tie cord to tie the album close.

This album is special to me as it represents two stages of my life. I have been legally blind for the last 7 years. Recently I had surgery on both my eyes. So far the surgery on my left eye has not been too successful as I am still legally blind in that eye. However, there was great success in the right eye! I currently have 20/30 vision in my right eye without corrective lenses! I am seeing things that I have never seen or haven't seen in 7 years. The most important thing...seeing my family and loved ones faces again! It has been a life changing experience for me. I started this album before my eye surgeries and finished it after my surgeries with my new vision in my right eye. Paper crafting was a huge struggle for me while being legally blind but I refused to give it up. I am having so much fun now creating with my improved vision!

Here is a video that shows the entire album, front and back covers as well as all of the inside pages.

http://www.youtube.com/watch?v=PzuJRb4yjDk

The design style of this album was inspired by Ginger / My Sisters Scrapper's tutorial on you tube. I included a link to her tutorial in my you tube video description box. Be sure to check it out as Ginger is soooo creative and has some fun albums and tutorials to share.

Thanks for stopping by!


Sunday, July 7, 2013

Prima Almanac Coin Envelope Mini Album

A coin envelope with too many pages to photograph...scratchy voice from the worse attack of allergies ever...and a camera that isn't working right....what is a girl supposed to do? Why make a video of course! :) In spite of the poor quality it still seem easier to make a video rather than trying to photograph all the pages. I have not embellished the outside cover yet and I have a bit more embellishing to do on the inside, other than that it is done. It was quick and easy to make...fun too!

Thanks for checking out my video!

Thursday, April 25, 2013

Balloon Birthday Card

A quick and simple birthday card...but I think a cute one! Hope you agree. The balloons are a punch, the happy letters are dies by Sizzix and the birthday part of the sentiment is computer generated. Printed paper is by DCWV and cardstock by Bazzill. The border punch is by Fiskars.

Thanks for stopping by!


Monday, April 15, 2013

Coin Envelope Mini Tag Book / Accordion Tag Book

Three posts in one day! I know! That is a lot for me. I wanted to post one more style of a tag book / mini album that uses coin envelopes to create an accordion style. The tutorial is by Christina Betts. You can find part one HERE and part two HERE. I made my own coin envelopes and if you would like to know how I made mine...check out my earlier post HERE. I used Lumiere Paints in copper to paint my edges of the chipboard and then distressed the edges with walnut and black soot Distress ink by Ranger. I used Kraft cardstock to make my coin envelopes and the designer paper is by 7 Gypsies. I have not completed my tags yet but I will be sharing those at a later date when I do. This is really a super easy and fun project. I hope you will check out the tutorial!

An inside view:


In case you missed my earlier post...here is a couple of views of this tag book and the vertical toilet paper roll tag album that I posted earlier.

 Thanks for stopping by!

Sunday, April 14, 2013

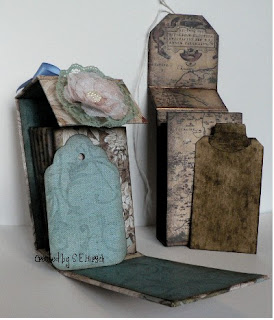
Vertical Toilet Paper Tag Mini Album

 I love to make tags and what could be better than a collection of tags in a cute tag album! This is a vertical toilet paper roll tag album that uses an incredibly easy hinge system and toilet paper rolls.  I used a medium weight chipboard, designer papers by K&Company and a handmade flower from a swap I was in. I have cut my tags  from chipboard and both sides have designer paper on them but I still have some more to do to the tags and will have to share those at a later date. I think I may be doing some more embellishing as well to the inside of the album. Meanwhile, you should check out Ginger's (mysisterscrapper) awesome tutorial on how to make the vertical toilet paper roll album. You can find the tutorial HERE for part one and HERE for part two. Her tutorials are well done and so easy to follow. She does some amazing work and creates some beautiful mini albums. I hope you check out her tutorial.
Here is an inside view of the album:


Thanks for stopping by!


Tutorial For Making A No. 3 Size Coin Envelope

 From time to time I find myself needing a coin envelope for a project I am making. Instead of purchasing them, I like to make my own. Making my own allows me to make the coin envelope in any solid color cardstock or designer paper of my choice. The size Number 3 coin envelope is the size I use most often. I thought I would share with you how I make mine. Pictured above is one with a closing flap and one without.

Instructions:
Using cardstock or designer paper of your choice...
Cut a 6" x 6" square
On one side score at 1/2" and 4- 3/4"
Turn your 6 inch square once (90 degrees) and score at 1- 1/2" and 4"
You will now be making 4 cuts. View the photo below to see where you will be cutting.
Basically  you are cutting away the four corners up to where the score lines meet at each corner. Once you have cut away your pieces your 6" square should now look like this:

The larger tab at the top is your flap and the smaller one at the bottom is the tab that will enclose the bottom of your coin envelope. You will notice that on the bottom tab I cut off the edge at an angle to make it easier for the tab to fold up and to give a neater look to your finished envelope. Now fold on all 4 score lines. Apply adhesive to the longer side flap and seal down over the other folded side flap. Apply adhesive to the bottom tab and fold up. I like to use a liquid adhesive for this but double sided tape also works well. Round the corners of the top flap if you like. You can also take a round circle punch and cut a half circle on the top of your coin envelope with the flap open if you like. I used a one inch circle punch on mine. You now have a number 3 size coin envelope which measure 2 -1/2" x 4- 1/4" when completed. Easy Peasy!

Need a coin envelope without the flap? No problem! Cut your paper to be 4-3/4" x 6".
Score at 1/2" on the 4- 3/4" side and score at 1-1/2" and 4 " on the 6" side.
Cut your two corners out from the bottom tab as directed above. Notch your bottom tab on each side of the tab, fold on the score lines, glue your side tabs together and then your bottom tab and notch the top with a circle punch if you like.

Hope this helps you to make a number 3 size coin envelope. Thanks for stopping by!


Saturday, February 16, 2013

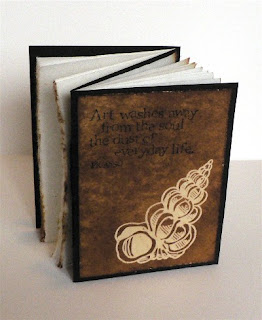
Do Si Do Book Tutorial / Dos A Dos


Do Si Do Book Tutorial
More commonly known as Dos A Dos 
( pronounced “dose – ah – doe" )


  A Do Si Do book, like the square dancing move with your partner, swings between two signatures. These books are like two books in one.  What is a signature? Well, first lets back up to what makes a signature.


A sheet of paper folded in half is a folio. Each half of the folio is a leaf; therefore a single folio would have 4 pages (2 each side of a leaf). Several folios placed one inside the other create a signature. A single signature is a booklet or small book. Multiple signatures make a traditional book. In terminology that us card makers would better understand...we are going to make a Do Si Do book that looks like a Z fold or tri fold card with papers in each fold making a double book!


So let's get started!


Supplies needed for a basic book:

1. Paper for the cover: I recommend something sturdy such as cardstock, thin chipboard etc. I do not recommend thin designer paper for the cover.

2. Paper for your pages: examples would be copy paper, rice paper, handmade paper, designer papers, lined or unlined papers etc.

3. Sewing needle with an eye large enough to be able to thread whatever you are using to sew your pages together.

4. Thread to sew your pages: Examples would be embroidery floss, narrow ribbon or ribbon floss, dental floss, waxed linen thread etc. I do not recommend regular sewing thread as it may break or tear your pages.

5. Something to pierce your holes in your pages: paper piercer, awl, push pin... all work nicely.

6. Bone folder for creasing

7. Ruler

8. Pencil

9. Scoring tool of some sort is optional but helpful when making your folds.

10. Scissors

11 Paper clips (optional)


The below directions contain the measurements to make a Do Si Do book the same size that I made shown in the pictures. You can make your book any size you want. See the Variations section at the end of this tutorial on how to make your Do Si Do book any size you want.


Step 1: Make your cover by cutting your chosen paper for the cover to 4 1/2" x 9 3/4". Score it at 3 1/4" and 6 1/2". Now crease one of the score lines into a mountain fold and the other into a valley fold...creating a Z or tri fold as pictured. I used black cardstock for my cover.


Step 2: Make your two signatures. Taking 5 to 10 pieces of your chosen paper for your pages, cut them to 4 1/2" x 6 1/2". I used 5 sheets of rice paper for each of my signatures before folding. Now fold each piece of paper in half so that the folded size is 4 1/2" x 3 1/4" Trim if you need to make any of your edges even or if you want your pages to be a bit smaller than the size of the cover. I chose to tear the one edge of my papers and then inked the edge with Distress Ink by Ranger. Now repeat this step for your second signature. Please note that you will want to avoid thicker  paper for your signatures. You will need to make less pages in your signature if you are using thicker / heavier paper.


Step 3: Make your template for piercing your holes. Take a piece of copy or scratch paper and cut to 4 1/2" x 3 1/2" in size. Fold in half so that it is now 4 1/2" x 2 1/4" and crease well. Open it up and with your ruler and a pencil, mark 1" in from the top and 1" up from the bottom in the crease. Then mark your third hole 2 1/4" in from either the top or the bottom...which should be in the middle. This is your template for making your holes in your signatures and cover.


Step 4:  Piercing holes into your signature and cover. Place one of your signatures into one of the Z folds of the cover. Place your hole piercing template on top of the signature...signature is open for this. I usually at this point paper clip the cover, signature and template together to hold it all in place while piercing my holes. Using your tool of choice for piercing ( I used my paper piercer) punch a hole into the three hole marks you made on your template going through your signature and cover.  Keeping the cover and signature paper clipped, carefully remove your template and save for the next signature.


Step 5: Sewing your signature and cover. Thread your needle with a 12" piece of your chosen thread or ribbon. I used black DMC #5 Pearl Cotton thread that I had from my crocheting days.  Working from the inside, enter the needle into the middle hole (#2 in picture) and pull thread through leaving a two inch tail to tie a knot later. Now bring the needle up from the outside cover and back into the inside by going through hole number 1 at the top. Now go down into the bottom hole ( hole # 3 in picture). Bring your needle back up into the middle hole (hole #2 in the picture). When you pull the needle into the center of the book again, make sure that the needle and thread is on one side of the long center stitch and the thread tail is on the other. You should have one long stitch on the inside and two stitches on the outside of your cover. Now remove your needle. Carefully pull your thread taut and then tie a simple knot with the two loose ends around the long center stitch. Trim your tails. You have just completed what is called the Single Signature Stitch (pamphlet stitch)! Repeat steps 4 and 5 for your second signature and Z fold.


You now have a Do Si Do book. If you used a pretty or decorative paper for your cover you may not want to do any more at this point. Or you may want to decorate it with some stamping, embellies etc. I chose to decorate  my cover using the Emboss Resist technique and stamping two of my favorite quotes.


Variations for making the Do Si Do book:

1. You can make your book any size you want. Whatever you decide you want your signature size to be, your cover should be the same height and three times the width of your signature and then scored into thirds to make the Z fold. Want to make a book that fits into an A2 size envelope? Cut your cover to be 5 1/2" in height and 12" long. Score the cover at 4" and 8" to make your Z fold. Your signature papers should be cut at 5 1/2' x 8" and then folded in half to be 4" x 5 1/2"...the same as one third of the size of the cover.


2. Are you stitching your signature and cover with a ribbon or pretty thread that you want to see more of? Try sewing your signature and cover with starting on the outside instead of the inside. Instead of tying a knot at the end, tie a pretty bow that will show on the outside of your cover.


A big thank you to my friend Keith who taught me how to make the Do Si Do book! 

These are such fun and easy little books to make. I hope you will give it a try. Thanks for stopping by and happy crafting!

Wednesday, January 30, 2013

Vase With Flowers Card / Embossing Resist Technique

What started out to be one thing...ended up another and that is what happened when I made this card for the "Neutral Colors" challenge over at ScrapZee.com. I had something totally else in mind which wasn't working out and this card ended up being plan B...and something I really liked after I finished it!

I used the Hero Arts and Sizzix Floral Stamps and Framelits to make my flowwers. I stamped them with Versamark ink on cream color cardstock then embossed them with clear embossing powder. I then inked them  with Walnut Distress ink by Ranger. This is called the  embossing resist technique. After inking them I then cut them out with the coordinating Sizzix framelits. The vase was made using a Spellbinders classic oval die and the background was embossed with a Cuttlebug embossing folder. My son calls this "the seventies meets Japanese"! It was a fun card to make and I hope to make more in other colors.

Happy crafting!

Tuesday, January 29, 2013

Clean and Simple Vintage Tag

Hello crafty friends! It has been one crazy Winter here in the Chicago area. Incredibly warm and no snow worth talking about. We are breaking all kinds of records this Winter. Other parts of the country are not so lucky. I hope wherever you are that you are staying warm and having some crafty time.

I made this tag for a challenge on ScrapZee.com. The challenge was to make something that uses a handmade flower. I made my flower from a paper bag and then spritzed it with walnut stain ink. I chose to make a tag to put it on. This is what I call..."my clean and simple approach to vintage"!

Thanks for stopping by and happy crafting!

Sunday, January 27, 2013

Birthday Wishes / Hero Arts and Sizzix Framelits Floral Stamp and Die Set

The current challenge over at ScrapZee.com is to make a card using a color that you do not like. I am not a fan of yellow...it is not a color I enjoy using. Much to my surprise though...I ended up liking my card. Would I make it again? Absolutely....but in another color other than yellow!

Flowers were made using the Hero Arts and Sizzix framelits floral set. Butterfly is made using two Martha Stewart punches. Scallop border is also a Martha Stewart punch and the trellis design is a Spellbinders die. Leaves are made using a Memory Box die.

Thank you for stopping by and happy crafting!

Saturday, January 26, 2013

Asian Inspired Card and Memory Box Woodland Branch Die

 The challenge for this one over at ScrapZee.com was to use a background stamp. I grabbed one of my all time favorites...Japanese writing, created my vases using circle and oval punches, and a die from Memory Box called Woodland Branch.  Creating a clean simple Asian inspired card!

Happy crafting!

Thursday, January 24, 2013

House Mouse "Monica Romances" and Memory Box "Wild Blooms" cards. Use of Negative Space


I hosted a challenge over on ScrapZee.com a couple of weeks ago. The challenge was use of negative space. I made two examples for the challenge. The first one I used the House Mouse image, "Monica Romances" by Stampabilities. The image is colored with Prismacolor color pencils. I used a heart die by Spellbinders to create my heart border on the bottom of the card. The negative space allows the red mat to show through the hearts. What did I do with the hearts I cut out with the heart die? I used them to dangle from my twine bow of course!

The next card was created using a die from Memory Box called "Wild Blooms". I used the negative part of the flower to make my card and put the flower I cut out away to use another day on another card.
Working with negative space can open up another use for your dies and punches. Need some more inspiration? Check out my Pinterest board for cards made using negative space: HERE

Wishing you all Happy Crafting!