Sunday, August 31, 2014

CMYK and Favorite Quotes

 I recently have been enjoying exploring and working with CMYK. What is CMYK, you ask?

"Short for Cyan-Magenta-Yellow-Black, and pronounced as separate letters. CMYK is a color model in which all colors are described as a mixture of these four process colors. CMYK is the standard color model used in offset printing. for full-color documents. Because such printing uses inks of these four basic colors, it is often called four color printing."

I have had so much fun creating with these four colors with white as the background, that  I chose to use this color combo for my new adventure of opening an etsy store.  I'm using it for my packaging as well as my business card. Here is the front of my business card:


Look familiar? I used it as well for my blog header. I need to figure out something other than what I am currently using,  to go on my sidebars to work with my header.

CMYK was also the inspiration for the cards I made featured in today's post. Both cards were made for a challenge that required using a favorite quote. I love quotes so I actually have several favorites.

This first card features a quote by Walt Disney.
"If you can dream it, you can do it."

 The next card has one of my all time favorite quotes but unfortunately the author is unknown.
"Attitude is the world's paintbrush. It can color any situation."

Would you like to see some more CMYK? Check out my CMYK pinterest board. There are some fun pins on there! Hopefully I have inspired you to try creating with CMYK too.

Do you have a favorite quote?

Thanks for stopping by!

Friday, August 29, 2014

New Blog Name & Art Work of Tommy Hirsch

Tsunami
I'm making some changes! I have a new name and a new address for my blog. I recently decided to open an etsy store. Doing so I decided to have one name for both my etsy store and my blog. Introducing:

My Mindful Creations

Over the next few days you will notice a few more changes as I do some cleaning up on my blog. A new design...a new header...and I will be sure to have links on my sidebar to my etsy store and Pinterest boards. I am looking forward to my new adventure and I hope you will stop back often to see what I am up to and I would love to have you check out my etsy store. Currently I only have two items listed as I was in a mad rush to get things going and get it open. I will be adding more items very soon. You can find my etsy store HERE

As promised in my last post (sorry for the delay), I would like to share some photos of work that my son created. My son who is an artist was asked by a friend of his to participate in a fine art show that she was organizing. Normally this is not something he would do but he wanted to help his friend...so he agreed. Normally he does fine art photography and sculptures, but this show was more about functional art. So it was quite the challenge for him to make items that would be functional but also have a bit of fine art sculpture to them. In some cases it was one or the other. All the pieces though that he had at the show were all nature inspired. The picture above is of a piece he calls "Tsunami" and was my favorite of this show. Here are a few more of my favorites:

Copper Wire Vases

Crocus Vase

Ribbon Vessel

Safari Vessel Duo

Orange Speckled Vessels

Red Dot Vessel

Two Tone Vase
These next three I wish you could see in person as the glazes used on the outside and inside were both designed by my son. They can't be found anywhere else. The darker glaze on the inside of the shells has beautiful hues to it and even a hint of threads of gold can be seen. For now he is keeping it a secret on how he developed the two glazes.

Shell

Shell Platter

Spiral Shell
Lastly, this next piece was inspired by a leaf he found in our front yard and is part of a series he currently is working on.

Leaf

I would love to share more pieces with you but it would end up being a rather long post and a bit picture heavy! Eventually though, these and other pieces will be on my son's web site with more than one view of every piece. I will be sure to post a link to his web site once it has been updated.

Thanks for stopping by and visiting with me! I hope you will stop back again soon.


Saturday, August 23, 2014

Inlay Technique For Cards

Hello everyone! The month of August is almost over...can you believe it? Kids are headed back to school as I am sure a lot of moms are happy about. Both my kids are grown adults now but I was one of those moms that enjoyed having her kids around. So I wasn't always happy to have school start backup again after the summer break. My youngest is an artist. He participated in a fine art show this weekend, which would explain why I haven't posted in the past week. He only had two months to prepare for the show so things have been quite hectic, especially this past week. Tomorrow I will share some of my favorite pieces from his show.

Today though I would like to share with you a couple of cards that I made using the inlay technique. Super simple technique of using dies or punches to create the same effect you see in inlay wood. For mine I used circle dies by Spellbinders. I finished the technique with running the design through an embossing folder by Stampin Up. The cardstock is by Bazzill. My color choice was inspired by a design from a tube of face wash.
Jennifer McGuire has a video tutorial that is perfect for learning how to do this technique if you would like to try it. Here is a link to her video: Inlay Technique by Jennifer McGuire
 It is a fun technique that allows you to mail your card without extra postage due to "lumpiness" caused by blinging up your card. All you card makers out there know what I am talking about! However, you can bling it up too.


Thanks for stopping by!


Thursday, August 14, 2014

Altered Matchboxes, Graphic 45's Botanical Tea Paper Collection


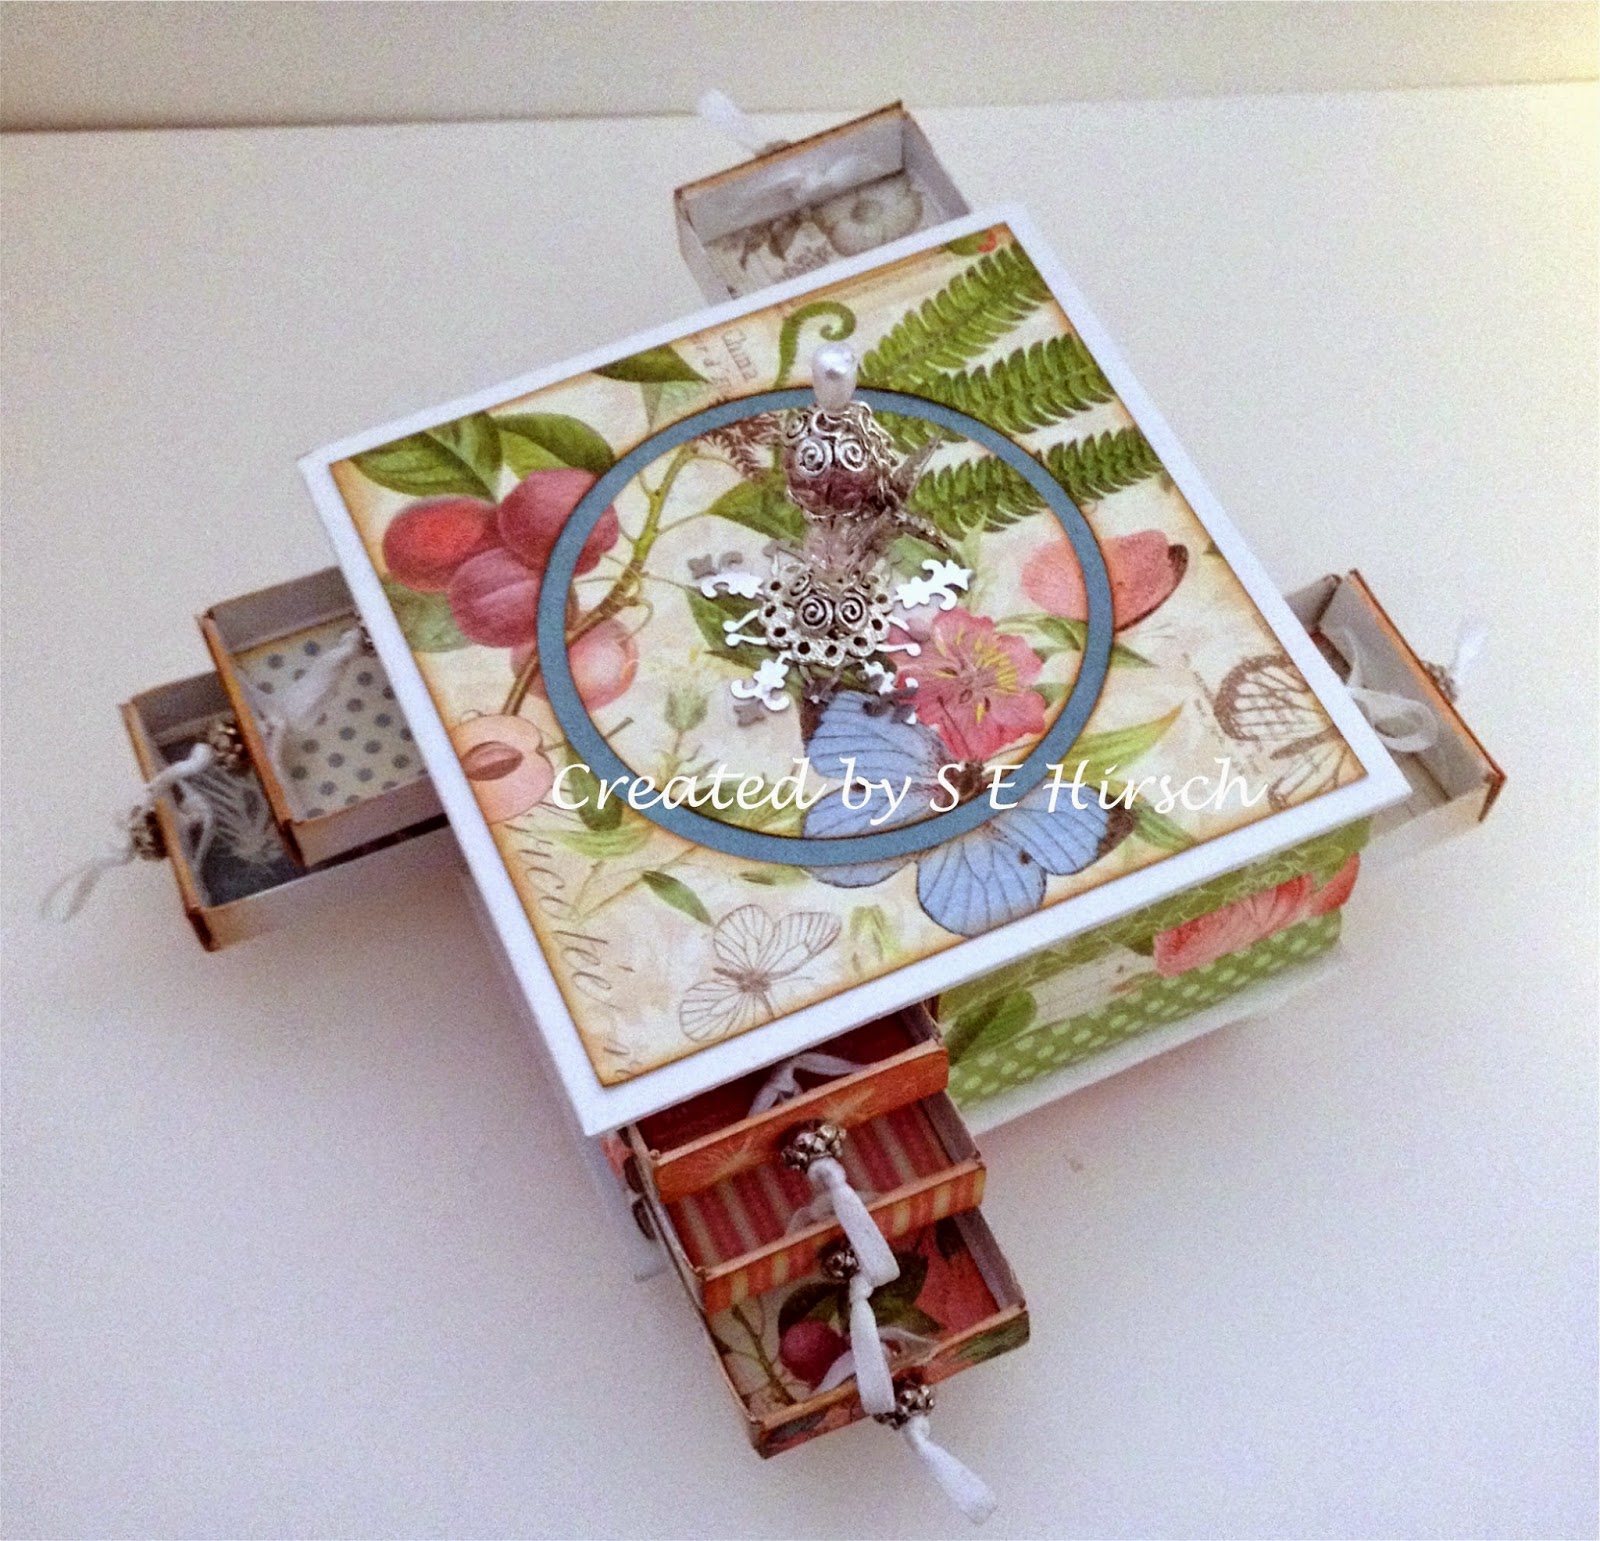
Awhile ago I participated in a challenge that required us to alter a matchbox (s). I decided to try altering the small size matchbox and combine several of them together. You can see the result of that challenge in my February 14, 2014 post. I have become addicted to altering matchboxes since that challenge! This is my latest matchbox creation which is similar to my first one. The first one is two matchboxes high and this one is three high. I made this one for a good friend of mine who loves the Graphic 45 Botanical Tea paper collection. So there was no question that I had to use that collection for this creation. She also loves hummingbirds. Hence the stick pin with hummingbird charm. Here are several views showing all the sides, top and inside the drawers.
Side view

All matchboxes are covered with Graphic 45's Botanical Tea  paper. Matchboxes are adhered to painted chipboard pieces that are also covered with the Botanical Tea paper.


Stick pin is handmade with a hummingbird charm attached.


Close up of stick pin and charm


  All drawers are painted on the inside and then lined with paper. Drawer pulls are made with ribbon.


Top view


 I hope I inspired you to try altering a matchbox or two! As always...thanks for stopping by and happy creating!


Friendship Card

A friend of mine sent me this image to color and turn into a card as a challenge. And a challenge it was as this is normally not my type of image. I kind of fussed and stewed and offered to make dinner if my friend would come and color the image for me. She informed me that I was perfectly able to color the image myself :)  I thought about bribing her next with an offer of cheesecake but instead I pulled out my color pencils and started coloring. I don't think it turned out too bad! Thanks for the image and the challenge Jenny!

Tuesday, August 12, 2014

Blocks Card


Something different today...a block card. A super easy card to make and folds up flat for mailing. Want to know how to make your own block card? Check out papercrafter45's video. Her videos / tutorials are awesome. Always easy to follow, fun , inspirational and sometimes with a bit of humor! She is one of my fav you tubers!

I would also like to share a link to my Pinterest board, "Block Cards", full of fun and inspiration of block cards that I have pinned.

Thanks for stopping by and checking out my block card!


Asian Inspired Mountain Scene Card


I made this card several months ago but never got around to posting it. Eeks! To create the card I stamped the mountains first. I then masked off the mountains and a portion of the top and bottom of the card so that I could ink in the sky. After I was finished with the sky, I removed all the masking and then stamped the dragonfly and Asian lettering. Lastly I embossed a straight line just below the mountain scene. A clean and simple look with no layers and didn't require extra postage for mailing!


Sunday, August 10, 2014

Happy Hopper Seed Shooter

How about a fun, smile maker card? The Happy Hopper Seed Shooter is just that. I remember as a kid, sitting on the back porch with my grandpa, eating watermelon and seeing how far we could spit our seeds. Fun days and fun memories! I colored the image with Prismacolor colored pencils. The Summer Fun sentiment is computer generated.

I hope you all have been having a fun summer making lots of happy memories.


For today's post I would like to share with you a card I made using inchies...7 inchies to be exact! I had so much fun making this card. I used watercolor paper with Ranger's Distress Ink to create the background. The inchies were made using the same background technique and then stamping my image of the dragonfly before cutting into 1" squares. I used a bit of Stickles added to the wings to add just a bit of sparkle to my card. Clicking on the photo will allow you to view a larger version of the photo.

Thanks for stopping by and taking the time to view my card.
Happy creating!